Showing posts with label Crafts. Show all posts

Friday, May 18, 2012

{Craft Project} Headbands

If you read this post you know that my crafting has gone into overdrive since finding out I was having a girl.  First I made these and next it was onto hair pretties!  From what my mom says I was born with little to no hair and it stayed that way for a few years.  That and it was white blonde so what hair I did have didn't show.  My mom called me "Baby Gandhi" and has since found pleasure in telling friends, boyfriends and acquaintances this little nick name.  Her constant reminder of my baldness as a baby used to irritate me but now I realize a lot of baby girls are as you would say "hair challenged."

With this in mind I came up with my second baby girl craft project... headbands!!!  What better way to keep her from getting called a boy while her hair grows in than cute little hair pretties... or head pretties I guess you could say as the hair may not be there right away :)

For a few weeks I scoured my favorite website (other than Pinterest) ETSY and collected lots of different materials to make my headbands.  Here are two shops I purchased from Fleuriste Craft Supply and Pretty Things Supplies.  Both were great to work with!  I had a tough time deciding what all I wanted to get and in what colors so I bought a few different things to start and will be back to buy more.  I also love wearing headbands and so figured that while I was ordering some for the baby I would order some adult size to make some for me!

The creating day came and my sister-in-law, Alicia, had planned to join me.  I found out before we started that Alicia was a little nervous to come over as she's not much of a crafter.  However, after she made her first one she realized how easy and fun it actually was!  This was my idea of a perfect Saturday morning crafting with a friend.  If anyone wants to join me next Saturday let me know.  You get to take home what you make :)

Alicia ended up taking home 2 headbands for herself, I made one for myself and baby girl has 4... so far.  Even our little model enjoyed the day (see below).

Here are some pictures from the day:

Some of the finished products.  Three for baby girl and the one on the left for me.

Alicia made this one for the baby, I love the soft colors with the punch of navy.

Supply table!
Our model showing off my creation.

The "mom really?" look

Ok, enough, get this off me I'm trying to slide here!  PS. Isn't that the cutest goalie T-Shirt?  Thanks to my aunt Joanie and cousin Betsy for that one :)

Monday, May 14, 2012

{Craft Project} Crocheted Crocodile Stitch Baby Booties

When I found out I was having a baby girl my crafting mind went a little out of control.  Literally the day I found out my head was swimming with ideas of what I could knit, crochet, sew, paint and create for this little unborn peanut.  Pinterest found my first answer.  These!  I really really wanted to make them, however, I'm a beginner crocheter.  I taught myself about 2 years ago by using the Crocheting for Dummies book.  I had really only made a few scarves and some hats that didn't turn out that great so when I saw the complexity of these I figured there was no way my crafting patience would hold up to this pattern.

My first crochet project was a baby hat for Max before he was born.  It turned out to be the hat/hats from The Three Bears story.  Let's just say I hate checking my gauge and measuring/counting stitches which is why I prefer to make scarves as they are straight rows.  I was so happy to finish my first little baby hat for the little one in my tummy.  Upon completion I held it up to show Luke my finished product and he looked at it and said "that's never going to fit a baby that thing could only fit a doll!"  In closer examination I guess he was right.  It was a little small.  So try again I did.  This time I upped my hook in hopes to produce the perfect little newborn hat.  Again, once completed I held it up for Luke and again he gave me an amused look and said "that hat could fit me!"  He was right again.  I popped it on my head and realized that it was a pretty good fit.  I did finally end up making the third "just right" hat but it still wasn't my best work.

This time I made sure to check my gauge as I didn't want to spend all this time trying to figure out a pattern and end up with booties that either would fit a Barbie or that she would have to wait until she's 10 to wear!  In the end I was pretty proud of myself for figuring this one out!  The first booty took literally all day on a Sunday for me to make.  Once finished I thought to myself, "Seriously, I have to do this again?"  I didn't want baby girl to only have one booty but it took me so long to make the first one and get it right that I took a week off before working on the second one.  The second booty was MUCH easier than the first which tells me that I should make some more and give them out as gifts!  Then once the buttons were put on I loved them even more.  The original photos of these from the pattern on Etsy shows them in the neatest rainbow yarn but I couldn't find exactly that at the store so I opted for something more girly that would match some of her cute outfits I have collected.  I think I'm going to make another pair and try to find the rainbow yarn because the crocodile scales look so much better with the yarn color variance.

Here is my finished product!


Monday, July 25, 2011

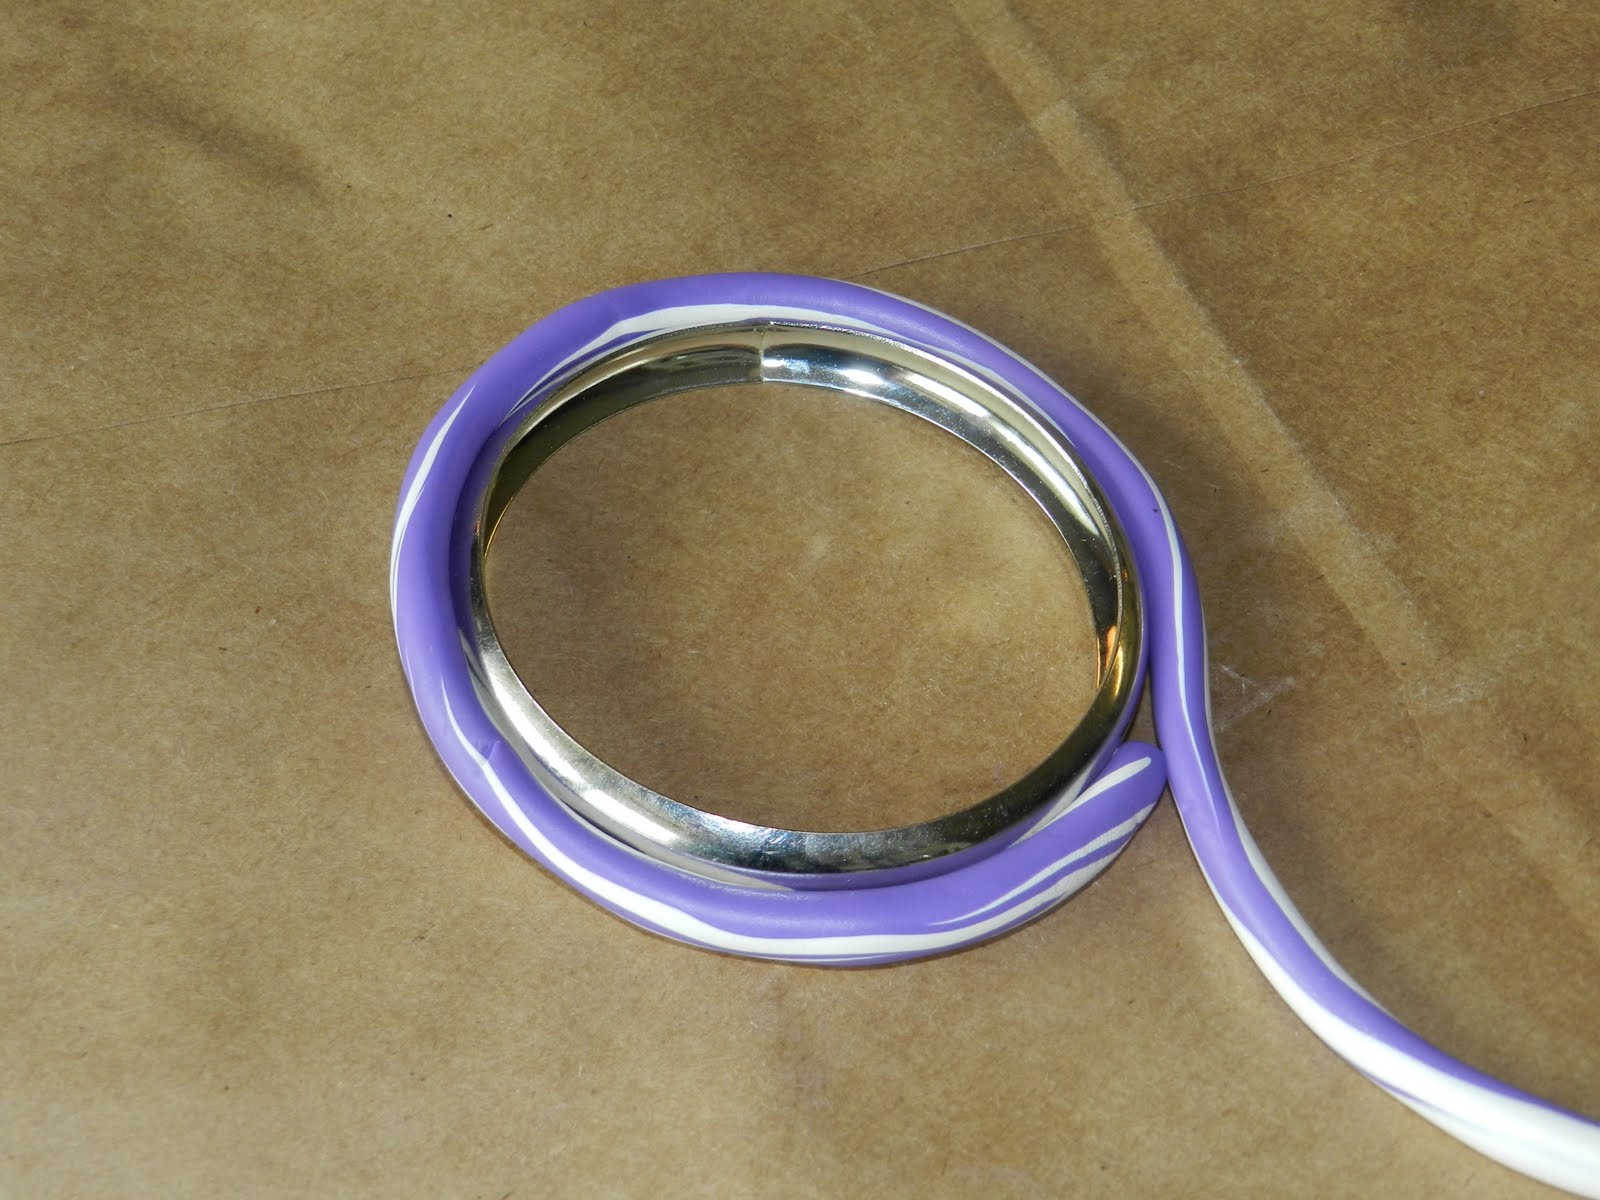
{Craft Project} Clay Bangles

I found another DIY that I just had to try (sorry for the rhyme).  Again, this was super easy and fun!  Thanks to Delighted Momma for the original posting here.


Max wanted to help.


 Take some polymer clay and kneed it until it's pliable.  Then roll it out into long snakes.


Next take two different colors and twist them together.  Rolling them out to make them smooth again.  You can choose to use as many colors as you like.


Use a bangle to measure out how big to make them and connect the edges.


Place them on a baking sheet and bake at 275 degrees for 15-20 minutes.


I made a bunch because they were so easy! I can't wait to try other colors.

Tuesday, June 21, 2011

{Craft Project} Diaper Box Bulletin Board

Thank you to my friend Jen for sending me the link to a post on the "I Choose to Thrive" blog.  She must know me well because as soon as I saw these bulletin boards I knew I HAD to make one... or two.  You can find the original post here at Thrive.


Last night after work Max and I went shopping for all of our materials to make my fun bulletin boards.  Max enjoyed waving at all the women in the craft store and even threw some spools of ribbon at them.  They giggled and bent down to pick it up for him... only a baby could get away with that!


After dinner I stayed up working on the start of my project, hoping to get at least some of it done before my bed time.  I found that not only were they super easy to make but also really fun!  It was one of those projects that I just couldn't stop.  I seriously want to make more but think it would be weird if my home was covered in bulletin boards.  {at least I would have plenty of places to stick my to do lists!}


Here are the steps: Diaper Box Bulletin Boards


Take a diaper box or any other box and open it up all the way. {I also used a wipes box that was a different size}


Spray the printed side with tacky spray and then fold it together so the printed sides stick.

This stuff is so cool.  I may just google "things to do with tacky spray" in order to use it again!
This makes the base of your bulletin board.  See below.


Next cut strips from the extra tab on the end in order to fill in the gaps.  Tape the pieces into the gaps using packing tape.  Then tape up the end to make sure it stays tight.  Spray what you consider the "Front" of your bulletin board with tacky spray and place that side down onto your choice of fabric.  Cut out the fabric to fit the box leaving an extra 1.5-2" border around the edges.


When you cut the fabric cut the corners off at an angle to make it easier to wrap the fabric around the corners.  Next using a hot glue gun, glue the fabric around the box making sure it's pulled tight.


To hang it up take ribbon of your choice and glue it to the back of the bulletin board.


Hang them up and you are ready to go!


I love the fabrics Max helped me pick out! 
Grab some push pins or thumb tacks and stick whatever you want to them!

Here is the start of my new baby wall.  These used to be on my refrigerator.  If you want me to put your baby on my wall send me your photo!!!

Here they are displayed in my kitchen.
I love how much these bulletin boards add to my space!


Tuesday, May 3, 2011

Craft Project: Beachy Bathroom Frames

I LOVE crafts!  Last summer when Luke and I were attending our first baby class we had to go around the room and say our name, what we were having boy/girl if we new and what we enjoy doing with our free time.  Being as it is Madison every other girl said outdoors things like camping, hiking, fishing, biking... I said crafting and artsy stuff, in those exact words.  Luke was so embarrassed that he let out a nervous laugh and gave me the evil eye for even stating such a ridiculous answer to the question out loud.  I'm sure he was thinking, can't you be like everyone else and say camping or something?

I have my own way of crafting.  Here are some things that I require in order to attempt a craft project:
1. Simple directions.  I do not like to read directions.  If I can't figure it out in one try I don't do it.  Preferably no directions, I like to make things up as I go.
2. No Math.  I don't do numbers.  This is the reason as to why I only knit/crochet scarves as they go in a straight line and there is no adding or subtracting of stitches. 
3. Quick.  I enjoy crafting but as a working mom I don't have all day to sit and embroider a blanket or something.
4. Can't look to "crafty" once finished.  I don't need doilies and decoupage everywhere.  I want things to look as though I purchased them from a store but also be able to say "hey, I made this."

With that being said, here is my quick evening craft project.  Beachy Bathroom Frames.

STEP 1
Head to your local craft store for supplies.  Supplies you will need are wooden frames (any size and shape), paint brush, sand paper and white paint.
STEP 2
Sand your wooden frames a little.  The sound of sand paper makes me cringe so I'm sure I should have done this a little better but I just couldn't stand it any longer.  On the plus side, these frames are supposed to look a little rugged so, oh well!  After this I took a slightly damp paper towel and wiped down the frames to take off any of the residual dust.


STEP 3
Next, begin painting the frames with the white paint.  Make sure to cover all visible areas on the front.  Only one coat is needed as it is supposed to look worn down.  Let the paint dry.
STEP 4
Take sandpaper and rough up the frames once the paint has dried  Focus on the edges and areas where normal wear would happen.

STEP 5
Select photos to be placed within the frames.  I chose a few pictures of my own from trips to Florida and Miami.  You can choose photos from Magazines or online if you don't have any of your own.  Just make sure that they go along with the beach theme in some way.  Once you find the photos you want to use you can place them in the frames.

STEP 6
Hang and Enjoy!

Here is an additional photo of my beach bathroom.  I know it's a little trite to decorate in a beach theme but I have such great memories of Florida and Hawaii that it makes me happy to see my beach decor!